zondag 18 december 2011

A Google map and a Streetview panel in your application

Including a Google map in your APEX application is of course not difficult anymore. You can find lots of examples of how to do that on the internet. But what about a Google map and a streetview panel in one page? It is possible, including a marker on the map that corresponds to the picture on the streetview panel. And navigating through the streetview panel also moves the marker on the map. And the coordinates (latitude and longitue) are captured into two text items, together with the yaw, the pitch and the zoom. The yaw is the view movement from left to right and the pitch is the view movement from the ground to the sky.

Here's how to do it:

Note: regarding the items and the button, replace the X by the pagenumber you are working on. And replace <your_key> by your Google Maps API key. You can obtain a key via https://developers.google.com/maps/documentation/javascript/tutorial

- Create the following procedure in the database:

create or replace PROCEDURE show_map (
                      p_map_div IN VARCHAR2 DEFAULT 'map-canvas', p_streetview_div IN VARCHAR2 DEFAULT 'pano', p_lat_item_name IN VARCHAR2
                     ,p_lng_item_name IN VARCHAR2, p_yaw_item_name IN VARCHAR2, p_pitch_item_name IN VARCHAR2
                     ,p_zoom_item_name IN VARCHAR2
                     )
  IS
    l_mapstr       varchar2 (32000);
  begin
    l_mapstr    :=    '
    <script src="https://maps.googleapis.com/maps/api/js?key=<your_key>&sensor=false">
    </script>
    <script type="text/javascript">
    var map;
    var panorama;
    var marker;
    var streetview;
    function initialize(myAddress, myLat, myLng, myPOV) {
      var mapOptions = {zoom      : 12
                       ,mapTypeId : google.maps.MapTypeId.ROADMAP
      }   
      map            = new google.maps.Map(document.getElementById('||''''|| p_map_div ||''''||'),mapOptions);
      panorama       = new google.maps.StreetViewPanorama(document.getElementById('||''''||p_streetview_div||''''||'));
      streetview     = new google.maps.StreetViewService();
      geocoder       = new google.maps.Geocoder();
      geocoder.geocode( { '||''''||'address'||''''||': myAddress}, function(results, status) {
        if (status == google.maps.GeocoderStatus.OK) {
          var markerOptions = {map       : map
                              ,draggable : true
                              ,animation : google.maps.Animation.DROP
                              ,flat      : false
                              ,position  : results[0].geometry.location
          }
          map.setCenter(results[0].geometry.location);
          marker = new google.maps.Marker(markerOptions);
          streetview.getPanoramaByLocation(results[0].geometry.location, 50, showStreetviewData);
          google.maps.event.addListener(marker, '||''''||'dragstart'||''''||', function() {map.closeInfoWindow();} );
          google.maps.event.addListener(marker, '||''''||'dragend'||''''||', function(event) {
            document.getElementById("'||p_lat_item_name||'").value=event.latLng.lat();
            document.getElementById("'||p_lng_item_name||'").value=event.latLng.lng();
            streetview.getPanoramaByLocation(event.latLng, 50, showStreetviewData);
          });
        } else {
          document.getElementById("'||p_map_div||'").innerHTML = "No mapdata found for given address. Did you enter a correct address?";
        }
      });
    }
  
    function showStreetviewData(data, status) {
      if (status == google.maps.StreetViewStatus.OK) {
        panorama.setPano(data.location.pano);
        panorama.setPov({heading : 270
                        ,pitch   : 0
                        ,zoom    : 1
        });
        panorama.setVisible(true);
        google.maps.event.addListener(panorama, '||''''||'position_changed'||''''||', function(event) {
          var panoramaInfo = panorama.getPosition();
          document.getElementById("'||p_lat_item_name||'").value=panoramaInfo.lat();
          document.getElementById("'||p_lng_item_name||'").value=panoramaInfo.lng();
          marker.setPosition(new google.maps.LatLng(panoramaInfo.lat(),panoramaInfo.lng()));
        });
        google.maps.event.addListener(panorama, '||''''||'pov_changed'||''''||', function(event) {
            var panoInfo   = panorama.getPov();
            document.getElementById("'||p_pitch_item_name||'").value=panoInfo['||''''||'pitch'||''''||'];
            document.getElementById("'||p_yaw_item_name||'").value=panoInfo['||''''||'heading'||''''||'];
            document.getElementById("'||p_zoom_item_name||'").value=panoInfo['||''''||'zoom'||''''||'];
        });
      } else {
          document.getElementById("'||p_map_div||'").innerHTML = "No Streetview data for this location?";
        }
    }
    </script>';
    --
    sys.htp.p (l_mapstr);
  EXCEPTION
    WHEN OTHERS
    THEN
      raise_application_error (-20000, 'error in show_map: ' || SQLERRM);
  END show_map;


A little explanation of the code:

This procedure uses a variable that holds Javascript code which is outputted by the sys.htp.p function. The procedure is called from the pl/sql region. The parameters are the name of the two divs where the google map and streetview panel are rendered, and the names of the items that hold the geo details, like latitude, longitude, yaw, pitch and zoom.

The code makes use of the Google api to find the latitude and the longitude for a given address. Furthermore is the code event-driven for the movement of the marker and the navigation through the streetview map. This recipe makes use of the Google maps api v3. Previously, this recipe used v2, which will be deprecated.

In the APEX builder, create an empty page.
Create 4 HTML regions. Call them Address details, Geo details, Google Map and Streetview map.
Click on the Geo details region and select 2 from the Column selectlist in the User Interface section. Click the apply changes button. Do the same for the Streetview map region.
Click on the Google map region and put the following code in the region source text area:

<div align="center" style="width: 100%; height: 300px;">
  <div id="map_canvas" style="width: 500px; height: 300px"></div>


- Click apply changes
- Click on the streetview map region and put the following code in the region source text area:

  <div id="pano" style="width: 500px; height: 300px"></div>
</div>


- Click apply changes
- Create the following items:

Region Address details:

- PX_ADDRESS
- PX_CITY
- PX_COUNTRY

Region Geo details:

- PX_LAT
- PX_LNG
- PX_YAW
- PX_PTCH
- PX_ZM

- In the buttons section, click the add button icon
- Select the address details region
- Select "create button among this region's items"
- Enter a name for the button, as well as a label. Click next
- Click next
- In the action selectlist, select "defined by dynamic action"
- In the execute validations selectlist, select no. click next
- Click create button

- In the dynamic actions section, click the add button
- Select advanced
- Wnter a name for the dynamic action, ie find_address. Click next
- In the event selectlist, select mouse button press
- In the selection type selectlist, select button
- In the button select list, select the button you just created
- Click next
- In the action selectlist, select "execute javascript code"
- In the code text area, enter the following code:

initialize(document.getElementById("PX_ADDRESS" ).value + "," + document.getElementById("PX_CITY" ).value + "," + document.getElementById("PX_COUNTRY" ).value,0,0,{yaw:0,pitch:0,zoom:0});

- Click next, click create
- Create a pl/sql region and enter the following code into the region source text area:

show_map('map_canvas','pano','PX_LAT','PX_LNG','PX_YAW','PX_PTCH','PX_ZM');
sys.htp.p('<script type="text/javascript">');
sys.htp.p('initialize('||''''||'Leidscheplein, Amsterdam,NL'||''''||','||0||','||0||',{yaw:'||0||',pitch:'||0||',zoom:'||0||'});');
sys.htp.p('</script>');


You can of course enter your own favourite address. In the User Interface section, select "No Template"  in the Template select list. Click apply changes.

The page is ready now. The result should look something like this:


Try to move the red marker on the google map. You will see that the latitude and the longitude columns change and that the streetview changes. In the streetview map, click on the arrows on the road to navigate through the map. You will see that the red marker on the google map also moves and that the geo details change.

By the way, you can get the regions straight put next to one another and stacked by putting the following into the Region attributes text field in the Attributes section of the Address details and Geo details regions:

style="height:200px"

vrijdag 9 december 2011

Dynamic quick picks

Quick picks are those little red links with predefined values you see under (mostly) listboxes in the APEX builder.


They offer the user a flexibilty because the user can fill an item with a single click.Since APEX 4.0, you can easily add quick picks to your items by selecting "Yes" in the Show quick picks listbox in the Quick picks section of the item.


However, you can only add static data to the quick picks. Sometimes it would be very handy to make the quick picks dynamic. Let's say you have a CV application where you can add language skills to employees and suppose you want to have a language selectlist with quick picks of the 4 most used languages.

In 2008, long before APEX 4.0 was released, Anthony Rayner already wrote a blogpost about creating your own dynamic quick picks. Now, since APEX 4.0, you can create a plug-in for these kind of user-interface enhancements. In this blogpost I will show you how to do that.

Preparations:

We are going to use the following tables:

Table CBR_LANGUAGES:

LNG_ID           NUMBER(5)
LANG_DESCRIPTION VARCHAR2(20)

Table CBR_EMP_LANG:

ELG_ID NUMBER(5)
LNG_ID NUMBER(5)
SPEAK  VARCHAR2(30)
WRITE  VARCHAR2(30)
EMP_ID NUMBER(5)

sequence CBR_ELG_SEQ

Steps:

- Go to your application
- click on shared components
- in the user interface section, click plug-ins
- click the create button
- in the name section, enter a name for the plug-in, ie Dynamic quick pick, in the name text field
- in the internal name text field, enter a unique name, ie com.ciber.dynamic.quick.pick. This will be used internally by APEX
- in the type selectlist, make sure item is selected
- in the source section, enter the following code:

function render_quickpick (p_item                in apex_plugin.t_page_item
                          ,p_plugin              in apex_plugin.t_plugin
                          ,p_value               in varchar2
                          ,p_is_readonly         in boolean
                          ,p_is_printer_friendly in boolean )
return apex_plugin.t_page_item_render_result
is
  TYPE query_type  is REF CURSOR;
  TYPE query_type1 is REF CURSOR;
  c_query_cursor query_type;
  c_topn_query   query_type1;
  l_result       apex_plugin.t_page_item_render_result;
  l_query        apex_application_page_items.attribute_01%type := p_item.attribute_01;
  l_topn_query   apex_application_page_items.attribute_02%type := p_item.attribute_02;
  l_return       varchar2(20);
  l_display      varchar2(20);
  l_name         varchar2(30);
begin
  --
  -- get an APEX input name
  l_name := apex_plugin.get_input_name_for_page_item (p_is_multi_value => true );
  sys.htp.p('<select name="'||l_name||'" id="'||p_item.name||'" size="1" class="selectlist">');
  --
  -- create the selectlist
  open c_query_cursor for l_query;
  loop
    fetch c_query_cursor into l_display, l_return;
    exit when c_query_cursor%notfound;
    if l_return = p_value
    then
      sys.htp.p('<option value="'||l_return||'" selected="selected">'||l_display||'</option>');
    else
      sys.htp.p('<option value="'||l_return||'">'||l_display||'</option>');
    end if;
  end loop;
  sys.htp.p('</select>');
  sys.htp.p('<br/>');
  --
  -- The top-n query is optional, if empty, use the l_query
  if l_topn_query is null
  then
    l_topn_query := l_query;
  end if;
  --
  -- create the quick picks
  open c_topn_query for l_topn_query;
  loop
    fetch c_topn_query into l_display, l_return;
    exit when c_topn_query%notfound;
    sys.htp.p('<a href="javascript:$s('||''''||p_item.name||''''||','||''''||l_return||''''||','||''''||l_display||''''||');" class="itemlink">'||'['||l_display||']'||'</a>');
  end loop;
  --
  return l_result;
end render_quickpick;


- in the callbacks section, enter render_quickpick in the render function name text field
- in the standard attributes check the following attributes:

is visible
has element attributes
session state changeable
has source attributes
has width attributes

- click the create button but stay in the page.
- in the custom attributes section, click the add attribute button
- fill in the items with the following data:

scope: component
attribute: 1
display sequence: 10
Label: query
type: sql query
required: yes
minimum columns: 2, maximum columns:2


- click create and create another
- enter the following data:

scope: component
attribute: 2
display sequence: 20
Label: Top-N query
type: sql query
required: no
minimum columns: 2, maximum columns:2

- click create

The plug-in is ready. Now we will create a page that makes use of the plug-in.

- Go to the application builer and click the create page button.
- select form
- select form on a table or view
- in the table/view name selectlist, select cbr_emp_lang. click next
- click next
- select do not use tabs and click next
- click the radio button "select primary key" and in the primary key column 1 selectlist, select elg_id. click next
- select existing sequence and in the sequence selectlist, select cbr_elg_seq. click next
- transfer all columns to the right and click next
- click next
- enter pagenumber where APEX should navigate to when submitting or cancelling. You can also enter the same pagenumbers you are creating. click next
- click finish
- click edit page

Now we will include the plug-in into the application

- Click on the PXX_LNG_ID item (where XX is the page number)
- In the display as selectlist, select Dynamic quick pick [Plug-in]
- In the query text area (in the settings section), enter the following query:

SELECT LANG_DESCRIPTION D
,      LNG_ID R
FROM   CBR_LANGUAGES


- In the top-N query text area, enter the following query:

SELECT LNG.LANG_DESCRIPTION D
,      TOP_LNG.LNG_ID R
FROM   (SELECT LNG_ID
        ,      COUNT(LNG_ID) ORDERING
        FROM   CBR_EMP_LANG
        GROUP BY LNG_ID
        ORDER BY 2 DESC) TOP_LNG
,      CBR_LANGUAGES LNG
WHERE  TOP_LNG.LNG_ID = LNG.LNG_ID
AND    ROWNUM < 5


- click apply changes.

The page and the plug-in are ready. Click run to see the result.

zondag 21 augustus 2011

[APEX 4.1] New improved validation of tabular forms

One of the new features of APEX 4.1 is the improved tabular form handling. As from now it is possible to validate at row level. Besides that you can get the validation fired on the change of certain rows or columns.
Actually now you can do the same as you would do with triggers in the database. Let's see how to use the new features. Suppose we have a tabular form based on the EMP table and we want to make a validation that commision cannot be null if the job is 'SALESMAN'. The constraint would be:

(job != 'SALESMAN') or (job = 'SALESMAN' and commission is not null)

Follow the steps below to create a validation on the tabular form (assumed that you already made a tabular form based on the EMP table):

  • In the validations section, click the add icon
  • In the Tabular form select list, select "Tabular Form"


  • Select page as the validation level
  • In the next step, enter a name for the validation


  • Select pl/sql as the validation type
  • Select pl/sql expression and click next
  • In the validation code text area, enter the following:
(:job != 'SALESMAN') or (:job = 'SALESMAN' and :commission is not null)
  • In the error message text area, enter an error message. Like:
Error: if job is Salesman, the commission is mandatory


  • Click create validation
You have now created the validation. You can see it in the validations section in the application builder.


Run the page to see if it works. For example look for a row where the job is Salesman and empty the commission field. Click submit to save. APEX should give the error message now.

If there is a row where the job is Salesman and the commission field is empty, you can also change another column, let's say the salary, to get the error message. That is because the execution scope is by default set to created and modifed rows. This also means that you may see rows that are invalid, according to the validation, but no error will show up because those rows are not modified. You can change this by doing the following:

  • Go to the application builder
  • In the validations section, click on the validation that we just created
  • In the conditions section, select "all submitted rows" in the execution scope list box.


zondag 14 augustus 2011

Creating a data loader

Apex.oracle.com has been upgraded to 4.1. One of the new features is the Data Loader. With the data loader you can load data into an existing table, directly from an Excel spreadsheet or CSV file or via copy-paste. When you enable the data loader, you create four pages that together form a wizard where the user can load data in a user-friendly way.Especially the copy-paste method offers the user a quick way to enter several rows of data. In this post I will show you how to create a data loader wizard and how to use it.

  • create a report on the emp table and remember the page number
  • create a button


 The report is ready. Now we will create the data load wizard
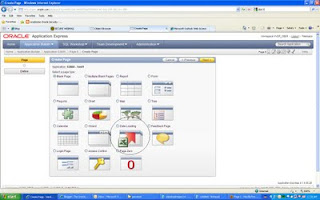
  • In the application builder, click create page
  • select Data Loading

  • enter a name into the data load definition name
  • in the table name listbox, select a table name, in this case emp
  • in the unique column 1 listbox, select empno
  • click next
  • in the next step you can use a lookup table to match the uploaded value against another table
  • click next
  • in the next step you can use transformation rules. For example if you only want to have values in uppercase then you can use the uppercase transformation rule to make the input uppercase.
  • click next
  • In the next step you can change the names of the different steps in the wizard. By default the steps are in English. In this step you can for
  • example translate the text.
  • click next
  • click next (select if you want to use tabs)
  • in the next step you can enter different names for the buttons and the page number this wizard should navigate to after the data load
  • click next
  • In the last step you get a confirmation of the data load wizard that you just created. Click finish
  • Remember the page number
  • Go back to the report you just created
  • Click on the created button
  • In the action when button clicked section, select "redirect to page in this application" in the action listbox.
  • In the page textfield, enter the page number of the startpage of the data load wizard.
  • Click the apply changes button.
The report is ready. Now we will load some data into the EMP table using the data load wizard

  • Run the report
  • click on the load data button
  • In the import from radio group, select copy and paste
  • In the separator text field, enter a comma (,)
  • In the copy and paste delimited data text area, enter the following:
7000,ROGERS,CLERK,7839,01/01/2011,3000,,10
8000,GRANT,ANALYST,7839,01/01/2010,2500,,10
  • Click next
  • Select the column name for each column you see.

  • click next
  • Click the load data button
  • You will see a summary of the process. It tells how much rows are inserted, updated or failed.

  • Click finish
  • You will return to the Employees report and, if everything went OK, you will see the two rows that you added using the Data load wizard.


If you want to change something to the data loader wizard, you can go to shared components and click on Data loading in the Logic section. Select the desired data load table. Here you can change the table lookups or the transformation rules. When you're done, click on the Re-create data load pages link on the right side of the page.

zondag 30 januari 2011

The Oracle APEX 4.0 Cookbook

Last year, on December 15th, our Oracle APEX 4.0 Cookbook was published. This book was written by myself and Michel van Zoest. The book covers more than 80 recipes that describe how to make, let's say, a tag cloud or how to use the new team development.

The book shows the new features of APEX 4.0 like websheets, team development, dynamic actions, plug-ins and jQuery integration. Since its publication, we already sold 24 copies in the United States. And my employer, Ciber, wants to order 20 copies to give away to relations.

We also already received some reviews of the book:

Review by Joel Kallman

Review by Surachart Opun

Review from a German rader

Review from an English reader

Review by Rinie Romme

The Oracle APEX 4.0 Cookbook is published by Packt. You can order it via The publisher or via the online bookstore like Amazon.