zondag 21 augustus 2011

[APEX 4.1] New improved validation of tabular forms

One of the new features of APEX 4.1 is the improved tabular form handling. As from now it is possible to validate at row level. Besides that you can get the validation fired on the change of certain rows or columns.
Actually now you can do the same as you would do with triggers in the database. Let's see how to use the new features. Suppose we have a tabular form based on the EMP table and we want to make a validation that commision cannot be null if the job is 'SALESMAN'. The constraint would be:

(job != 'SALESMAN') or (job = 'SALESMAN' and commission is not null)

Follow the steps below to create a validation on the tabular form (assumed that you already made a tabular form based on the EMP table):

  • In the validations section, click the add icon
  • In the Tabular form select list, select "Tabular Form"


  • Select page as the validation level
  • In the next step, enter a name for the validation


  • Select pl/sql as the validation type
  • Select pl/sql expression and click next
  • In the validation code text area, enter the following:
(:job != 'SALESMAN') or (:job = 'SALESMAN' and :commission is not null)
  • In the error message text area, enter an error message. Like:
Error: if job is Salesman, the commission is mandatory


  • Click create validation
You have now created the validation. You can see it in the validations section in the application builder.


Run the page to see if it works. For example look for a row where the job is Salesman and empty the commission field. Click submit to save. APEX should give the error message now.

If there is a row where the job is Salesman and the commission field is empty, you can also change another column, let's say the salary, to get the error message. That is because the execution scope is by default set to created and modifed rows. This also means that you may see rows that are invalid, according to the validation, but no error will show up because those rows are not modified. You can change this by doing the following:

  • Go to the application builder
  • In the validations section, click on the validation that we just created
  • In the conditions section, select "all submitted rows" in the execution scope list box.


zondag 14 augustus 2011

Creating a data loader

Apex.oracle.com has been upgraded to 4.1. One of the new features is the Data Loader. With the data loader you can load data into an existing table, directly from an Excel spreadsheet or CSV file or via copy-paste. When you enable the data loader, you create four pages that together form a wizard where the user can load data in a user-friendly way.Especially the copy-paste method offers the user a quick way to enter several rows of data. In this post I will show you how to create a data loader wizard and how to use it.

  • create a report on the emp table and remember the page number
  • create a button


 The report is ready. Now we will create the data load wizard
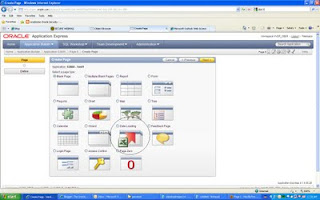
  • In the application builder, click create page
  • select Data Loading

  • enter a name into the data load definition name
  • in the table name listbox, select a table name, in this case emp
  • in the unique column 1 listbox, select empno
  • click next
  • in the next step you can use a lookup table to match the uploaded value against another table
  • click next
  • in the next step you can use transformation rules. For example if you only want to have values in uppercase then you can use the uppercase transformation rule to make the input uppercase.
  • click next
  • In the next step you can change the names of the different steps in the wizard. By default the steps are in English. In this step you can for
  • example translate the text.
  • click next
  • click next (select if you want to use tabs)
  • in the next step you can enter different names for the buttons and the page number this wizard should navigate to after the data load
  • click next
  • In the last step you get a confirmation of the data load wizard that you just created. Click finish
  • Remember the page number
  • Go back to the report you just created
  • Click on the created button
  • In the action when button clicked section, select "redirect to page in this application" in the action listbox.
  • In the page textfield, enter the page number of the startpage of the data load wizard.
  • Click the apply changes button.
The report is ready. Now we will load some data into the EMP table using the data load wizard

  • Run the report
  • click on the load data button
  • In the import from radio group, select copy and paste
  • In the separator text field, enter a comma (,)
  • In the copy and paste delimited data text area, enter the following:
7000,ROGERS,CLERK,7839,01/01/2011,3000,,10
8000,GRANT,ANALYST,7839,01/01/2010,2500,,10
  • Click next
  • Select the column name for each column you see.

  • click next
  • Click the load data button
  • You will see a summary of the process. It tells how much rows are inserted, updated or failed.

  • Click finish
  • You will return to the Employees report and, if everything went OK, you will see the two rows that you added using the Data load wizard.


If you want to change something to the data loader wizard, you can go to shared components and click on Data loading in the Logic section. Select the desired data load table. Here you can change the table lookups or the transformation rules. When you're done, click on the Re-create data load pages link on the right side of the page.